Illustrator tutorial: Envelope Distort
Posted: in Design, Tutorials
Got a hankering to create some psychedelic 60’s style typography? Or just need to put a word in a banana? Then this post is for you. It’s the forth in our Illustrator tutorials series – the Envelope Distort tool.
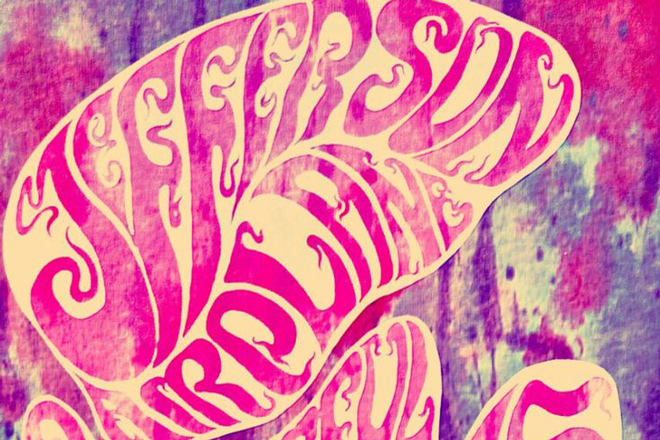
In the 60s or 70s people who wanted to create typography in a 60s or 70s style had to paint each letter individually. What a chore! Thanks to Illustrator, the same result can be obtained in a matter of seconds using the Envelope Distort tool, leaving you more time to chill.
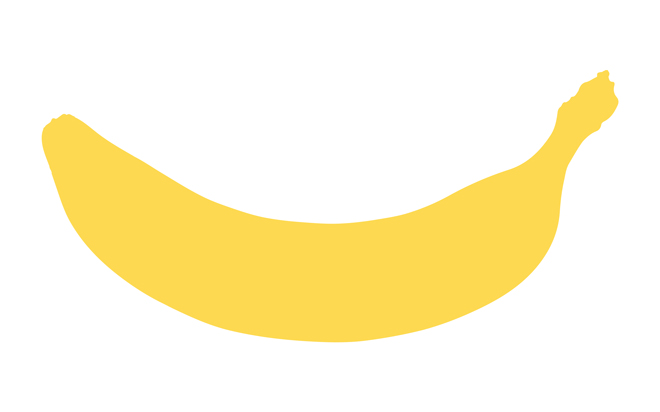
Here’s how to do it. Start by creating a distinctive shape. Simple shapes work best for this – we chose a banana (just in case you didn’t recognise it).
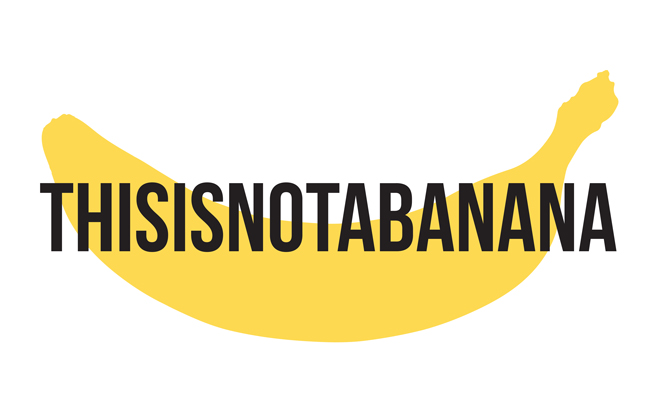
Now it’s time to add some text. We homaged René Magritte to commemorate his 117th birthday (if he was still alive today, and today was November 21st).

Next click on the text and then select Object > Envelope Distort > Make with Warp. According to your shape, select the most appropriate option from the popup menu to distribute the text more or less evenly across it. In our case, the arch distortion works pretty well.
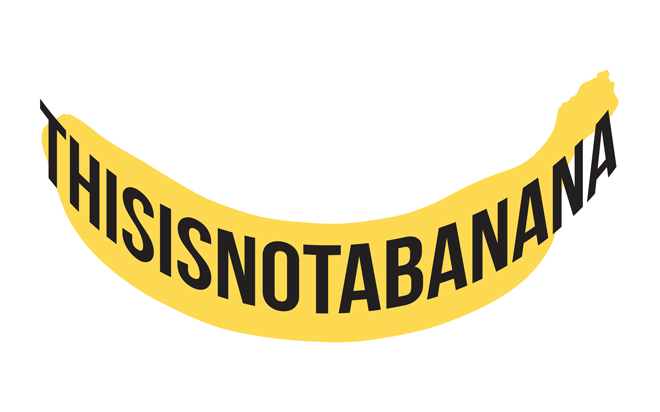
It’s worth moving the text onto the middle of the shape before you start the next step.
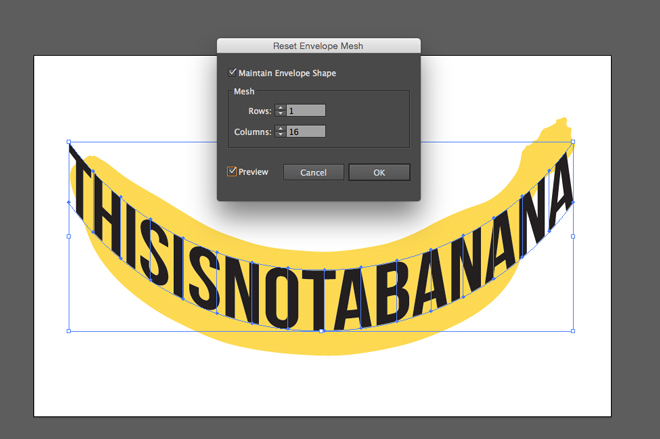
Here things get a little trickier: select the text and then navigate to Object > Envelope Distort > Make with Mesh. Now you need to calculate the average number of letters per row: these will be the number of columns (super confusing, I know). In our case it’s 16 letters, so we used 16 columns. Regarding the number of rows, simply stick to the actual number of rows of your text. We only have 1 row to keep things simple. Hit OK. Do it!
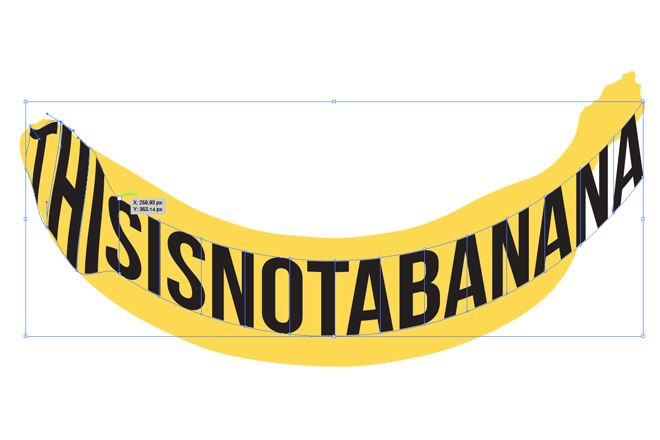
Next we need to do some tweaking (not twerking). Select every single anchor point with the direct selection tool (aka the white arrow) and move them along the edge of the shape.
Work your way all around the edge of the text to shape it accordingly. If you need to, you can also rotate the tangent handles to change the orientation of the single anchor points.
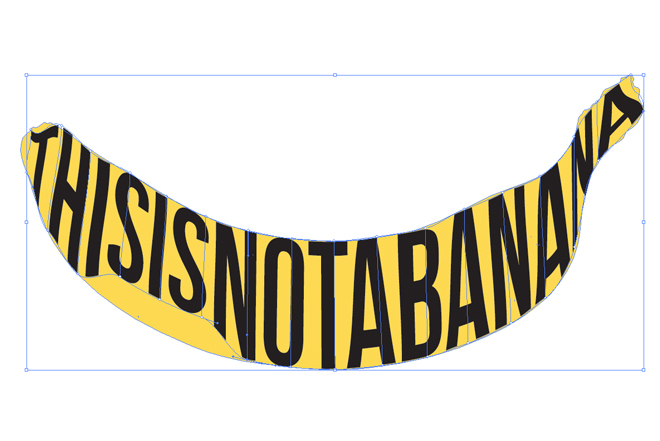
Good. If you followed our orders correctly you can now delete the reference shape, leaving just your awesome typographic text.
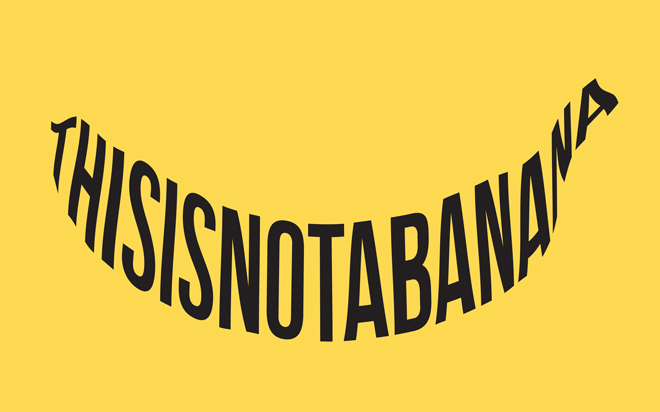
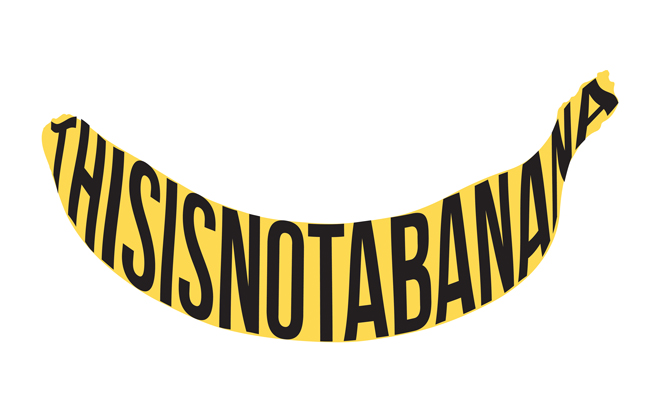
Our final touch is a yellow background. Pretty neat! Check out our other tutorials to learn about the Shape Builder tool, the Tilde Trick and the Blend Tool.


