Here’s how to make a 3D poster
Posted: in Design, Ideas, Projects
Anaglyph glasses at the ready – let’s go 3D! Ever since human beings grew eyes and invented camera lenses we’ve been obsessed with 3D imaging. Although 3D movies have never taken off in the way the big film production companies expected them to (if you’ve seen Avatar you’ll know why), 3D is great fun in both motion picture and static formats.
Creating your own 3D images is, as it turns out, pretty simple. All you need is:
– A digital camera
– Adobe Photoshop (or similar photo editing package)
– A pair of anaglyph glasses
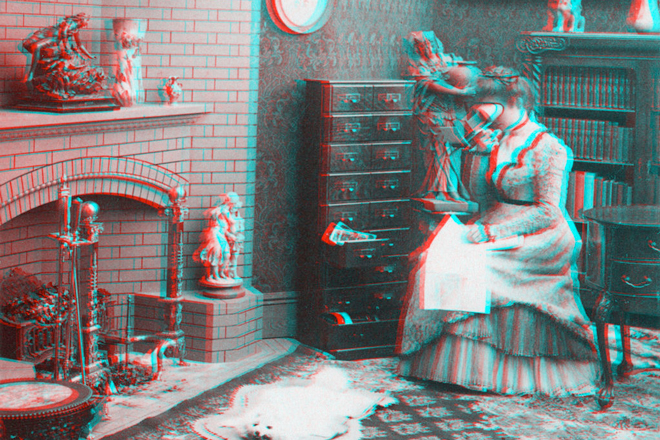
If you do it right you’ll end up with something like this (3D glasses required!):
We decided to create a 3D poster for a movie we’re working on called WRESTLERS RIDING DINOSAURS vs KNIGHTS. I don’t want to ruin the plot but it’s essentially the best bits of Jurassic Park, The Wrestler and A Knights Tale mashed up into a 3D masterpiece and filed under ‘Classic’.
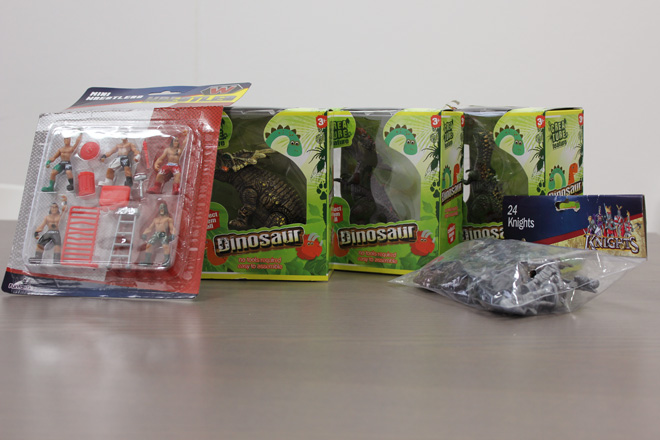
Since the wrestlers, dinosaurs and knights were out on location filming we had to sub in some doubles for the shoot. Fortunately the pound shop had some uncannily similar figurines:
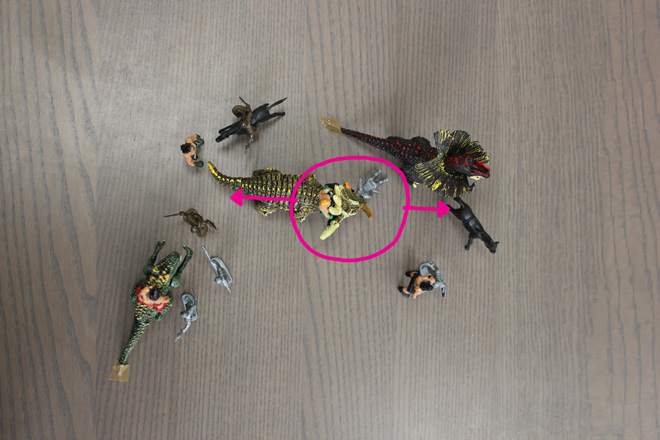
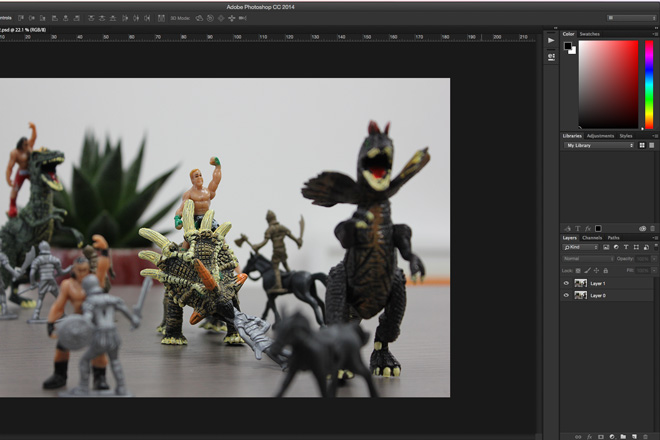
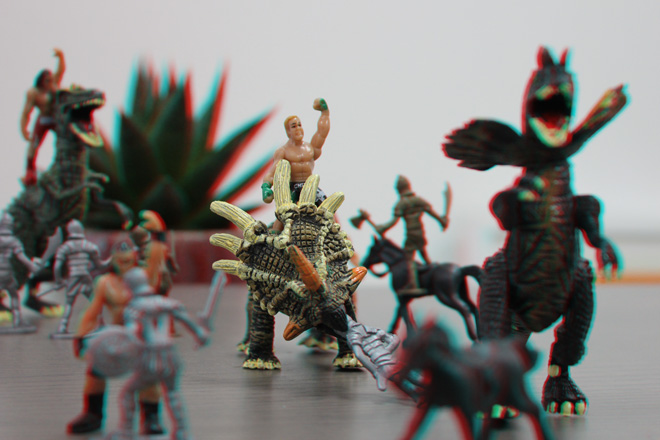
First we recreated a scene from the movie where some wrestlers riding dinosaurs are showing a bunch of knights what time it is:

For the 3D image to work you need to decide on a focal point. We chose the dinosaur riding wrestler in the centre of the image. This will give the image depth:
Time to get your camera out. Pro tip: make sure there’s a memory card in it, or you’ll be doing the whole thing again 🙁
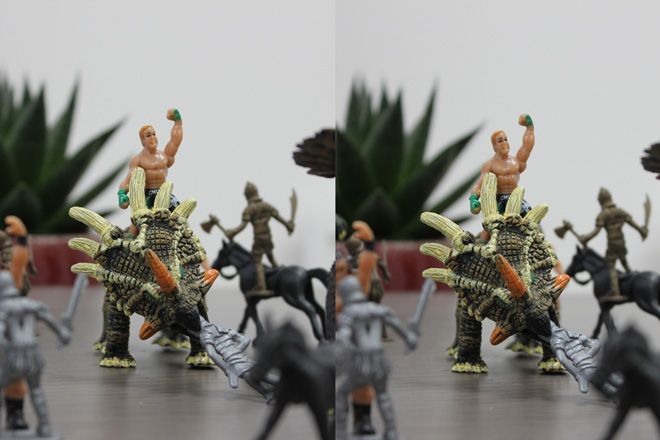
We placed the camera on the surface of the table around 20cm from the focal point – this can be varied according to the effect you’re after. We wanted our wrestlers, knights and dinosaurs to fill the frame. Take a photo, then slide the camera about an inch to the left or right (about the distance between your eyes), keeping the focal point in the centre of the photo. And take another photo.
Next we transferred our two photos to our ultra-fast Apple Mac, remembering to put the memory card back into the camera for the next person who uses it. Here are our two photos, side by side:
Next we fired up Photoshop. We haven’t used it since we found out what previous World Cup mascots are up to now, so it needed some updates.
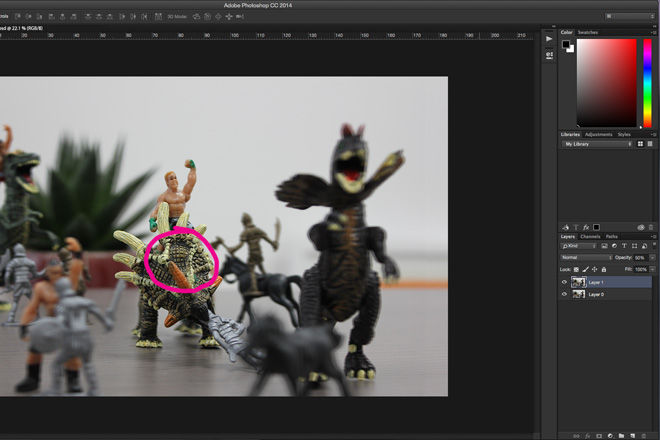
Once that had updated we opened our two photos up, and combined them onto one file (in RGB mode), each photo on a separate layer. The photo taken from the right side is the bottom layer, and the photo taken from the left side is on top:
With our file ready, we reduced the opacity of the top layer and aligned the focal point of the photo with the one below. In our case, the central dinosaur’s head.
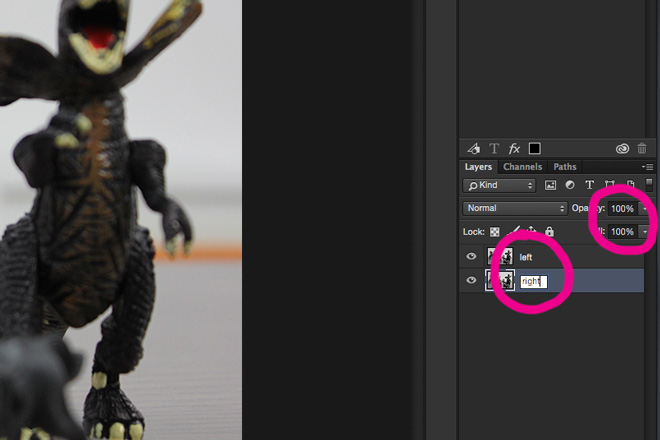
With this complete, we turned the opacity back up and renamed the layers ‘left’ and ‘right’:
Next, double click on the ‘left’ layer in the Layers palette, which opens the Layer Style dialogue box, and turn off the G (green) and B (blue) channels:
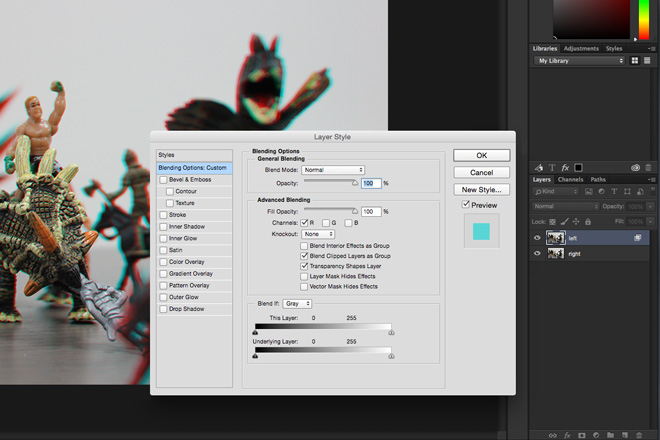
OK that, and open up the Layer Style dialogue box for the ‘right’ image. Turn off the ‘R’ (red) layer. OK again.
What you should have in front of you is an incredible 3D image. We put on our anaglyph glasses and it was like we were back in the triassic period. Quite terrifying! Here’s our finished image:
Since it’s a movie poster we finished it off with some text, and a bit of lightning. Every movie poster should have lightning:
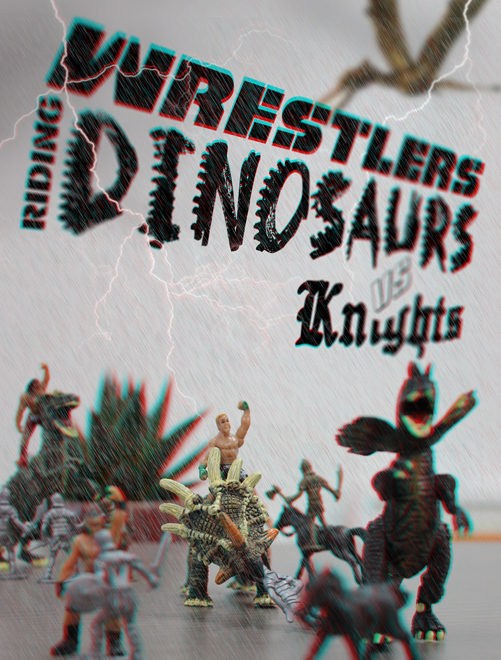
Naturally, we printed it out for our office wall. It’s nice to enjoy 3D (and the small accompanying headache) on a daily basis. Here’s our finished poster:

Wrestlers Riding Dinosaurs VS Knights. Catch it in cinemas soon!


