Make your own paper wallet
Posted: in Ideas, Projects
I keep my mind on my money and my money in my paper wallet! Paper wallets are a great way to keep your money and credit cards in one place while on holiday, at a festival or just on a night out. They also make great personalised gifts and are very easy to make.
With all the money lying around the Diginate HQ (not really, burglars), we finally had to figure out a way to keep them in one place. Since we can barely remember the access code to the front door, we figured a safe would be a bit too complicated for us. We also figured we should have something that’s a bit more portable, so we decided to make some paper wallets.
When we go out we don’t always want to take all our valuables with us (we tend to lose them or, more often, spend them and forget that we did, subsequently believing we’ve lost them). Paper wallets are perfect for just taking a few notes, an Oyster card and possibly a few business cards with you, while leaving the Visa and MasterCard at home. No one wants to walk back into the pub the following day, looking tired and scared, and pay a massive bill from the day before, right?
We printed our designs on Art Paper for a sturdier wallet, but you can also use Matt Posters if you prefer a thinner one. The size of our sheets were 25x35cm to make sure we could fit all the cards and notes, but A4 will also work. We made two slightly different versions with different designs. Both are relatively simple patterns, which we thought would work well with the folding and not require much aligning. We also wanted to do some experimenting with the folding techniques and the patterns were perfect for that.
Octagons are the new triangles! We used patterns on our wallets, but you can have whatever design you want. Maybe a picture of your cat?
The texture of the Art Paper both looks and feels nice. It also makes a much more solid wallet than thinner paper would.
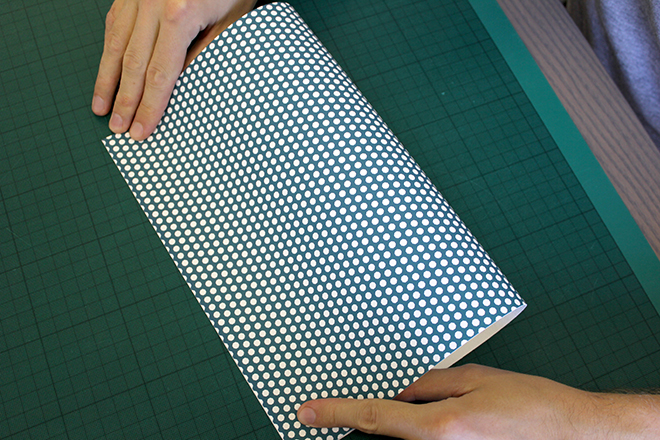
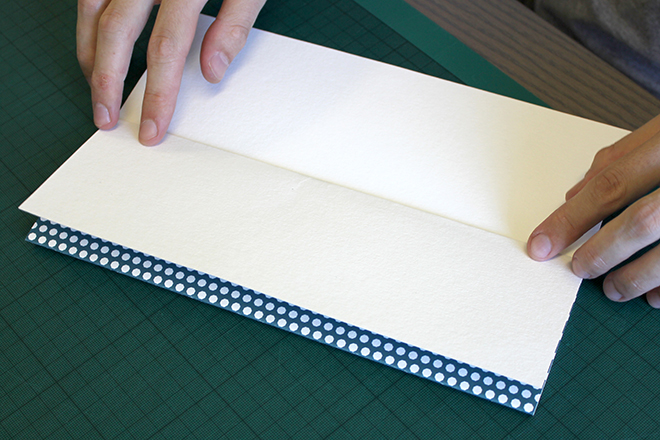
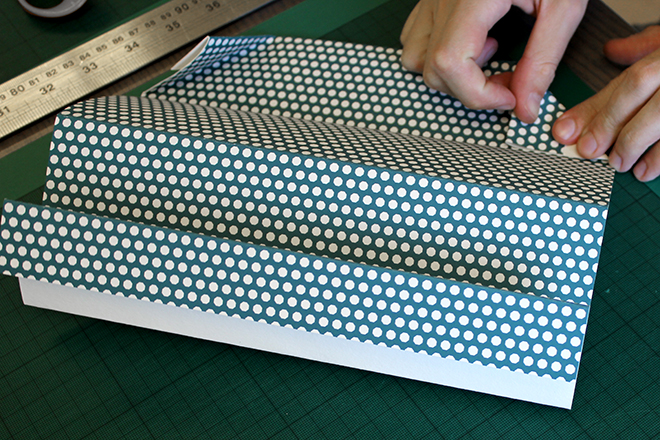
The folding is thankfully not too complicated, but still requires a bit of practice. It’s a good idea to try it a couple of times on a normal A4 paper first. Here is a step by step tutorial that shows you exactly how to make it.
This is just one way to make the wallet. We also made another slightly different fold that shows a bit more of the design, and with a bit of experimenting you can easily change the fold to fit your needs.
Make sure the folds are crisp.
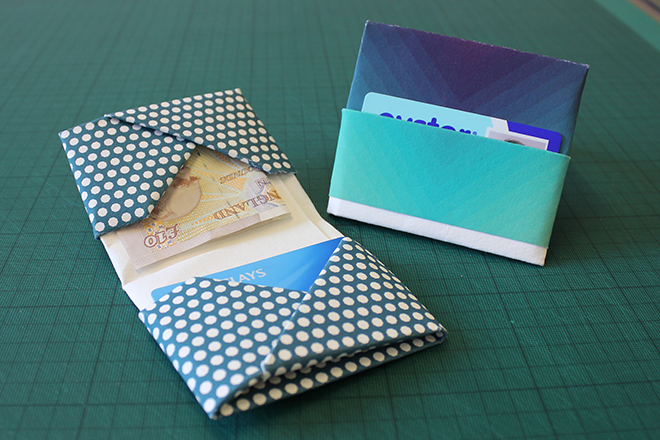
This is the finished wallet. This one-colour design works well with the Art Paper, letting the natural colour of the paper show through and contrasting well with the Sea Green colour we chose.
Our other design has more colour, which the Art Paper enhances with its nice texture. Both folds have loads of small pockets to store notes, credit cards, business cards, Oyster cards and all the coffee discount cards you never use.
