Make your own image changing RGB Light Frame!
Posted: in Ideas, Projects

Looking for something striking to hang above your bed, sofa or toilet? Look no further! This home made RGB Light Frame uses changing lights to (seemingly) change the artwork.
Check out the videos below and then see how you can make your own!
Part 1: three different photographs.
Part 2: three different illustrations.
To make your own RGB Light Frame you will need:
– A deep frame
– Colour changing light strips
– Diginate poster
– Tools (stapler, craft knife)
The size of our image and frame is 30x30cm but any (reasonable) size will do. The lights strips are 25cm long so they fit our frame perfectly. The frame also needs to be relatively deep to fit the lights. In fact, the deeper the better, as the lights will work better with some distance between them and the artwork.
The lights, which we’ve sourced from IKEA, have seven different colours, two different automated settings and includes a dimmer. They work by ‘drowning out’ the colours of the poster so that different colours on the poster are ‘hidden’ when the light changes. Please note that it needs to be dark for it to work.
The images were printed on our satin posters; order yours here.

Here is the frame and the light strips. You can make your own frame here and buy the light strips here.

Unpacked and ready to go!

The light strips conveniently come with double sided tape strips…

…which makes it very easy to fix them to the insides of the frame.

Use a stapler to fix the wires to the back of the frame – make sure you don’t staple through the wires!

Neat!

You need to cut off two of the corners of the backing of the frame (because of the wires) – we used a small saw, but a good hobby knife should do. Maybe it’s time to dig out that old Leatherman you got for Christmas ’97?

Using tape to reattach the backing makes it easy to change the artwork. Being very environmentally friendly, we used an old sticker, but you can use other things as well, even your old gum (which is also rather environmentally friendly)!

This is the finished frame…
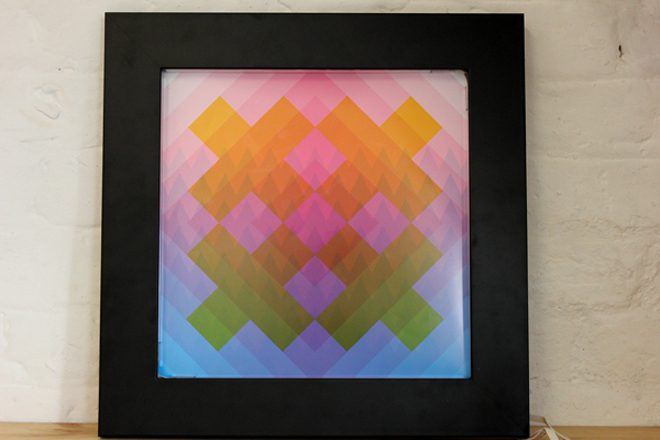
…set up and…

…lit!

Here’s how you set up the image: you will need three different images in the three colour channels (Red, Green, Blue or Cyan, Magenta, Yellow). Open an image, highlight a colour channel (Window, Channels in the Photoshop menu), copy the image and paste it into one of the colour channels of a new image. The finished image should look something like this:
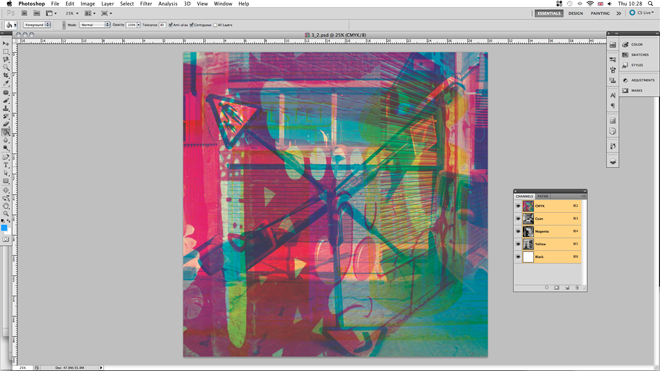
Full image (all channels).
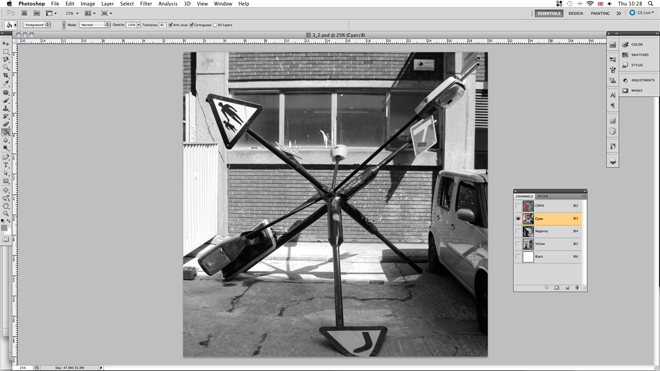
Cyan channel.
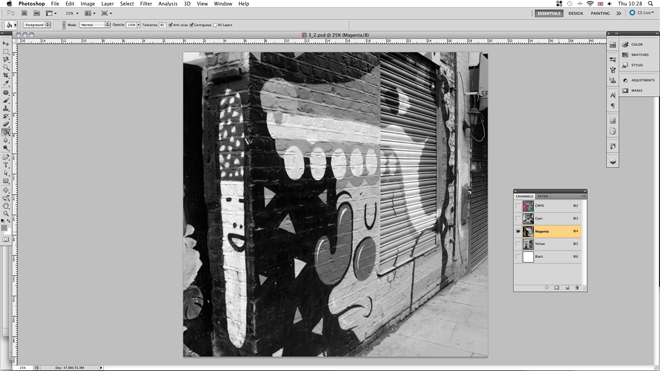
Magenta channel.
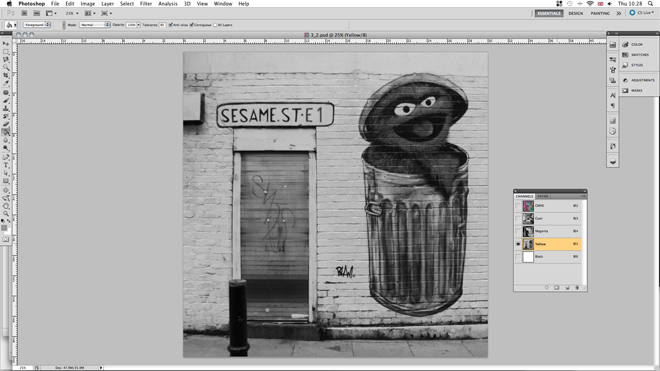
Yellow channel.
The RGB light often works best with photographs, but the rest is up to you!


